FI- Incoming Bank Entry
Executed by
Accounts Executive - Receivable
Processes triggered from
- Student Admission - New Student Admission "(Variant)", Existing Student "(Variant)"
- Student Transfer
- Other Sales
Navigation
Navigation 1 : Home > Accounting Module > Select Payment Entry > Click on New Payment Entry
Navigation 2 : Home > Go to Accounting Module > Select Receivables > Go to Payment Entry > Click on New Payment Entry
Steps
Navigate to the Bank Entry section.
Create a New Bank Entry.
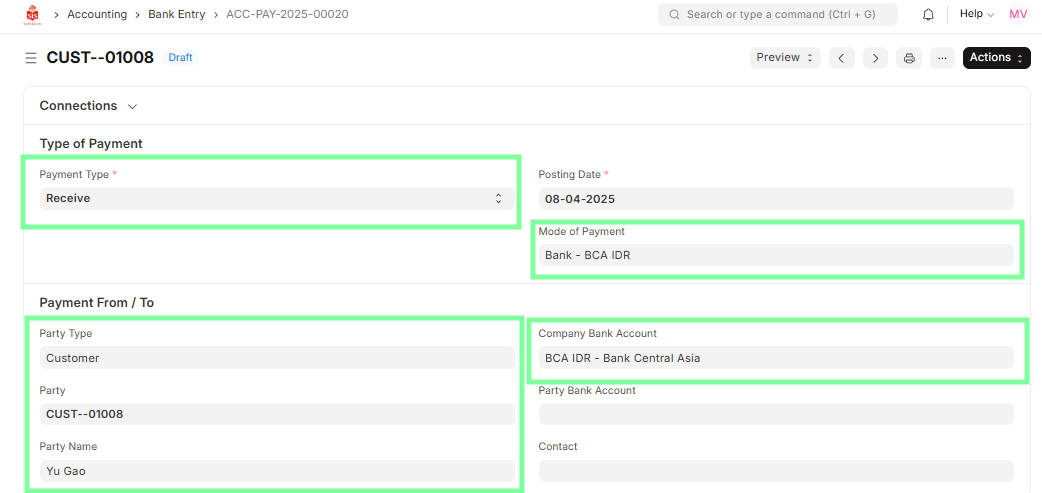
Select the Payment Type as Receive, and enter/verify the following payment details:
- Mode of Payment (e.g., Bank Transfer, Cheque, etc.)
- Party Type (Customer/Student)
- Party Name
- Company Bank Account (mandatory)
- Reference Details (e.g., Sales Invoice, Bank Account, Amount, Date)
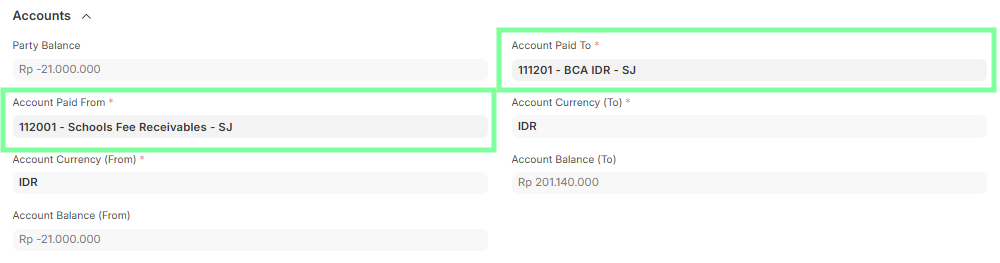
- In the Account tab, verify:
- Account Paid From (Customer's Bank Account)
- Account Paid To (Organization’s Bank Account)
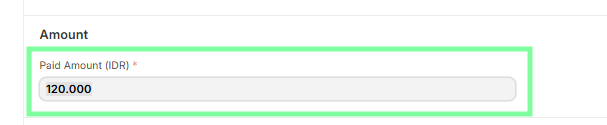
- Ensure the Paid Amount is entered correctly and matches the incoming payment.
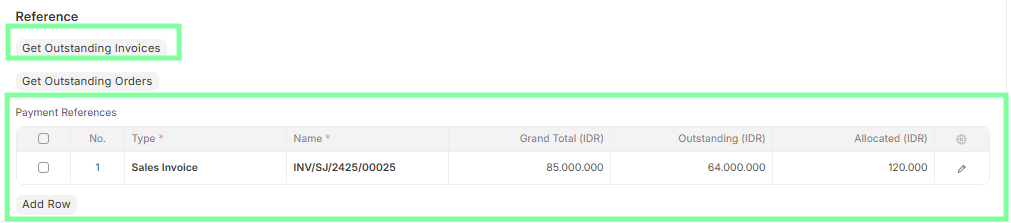
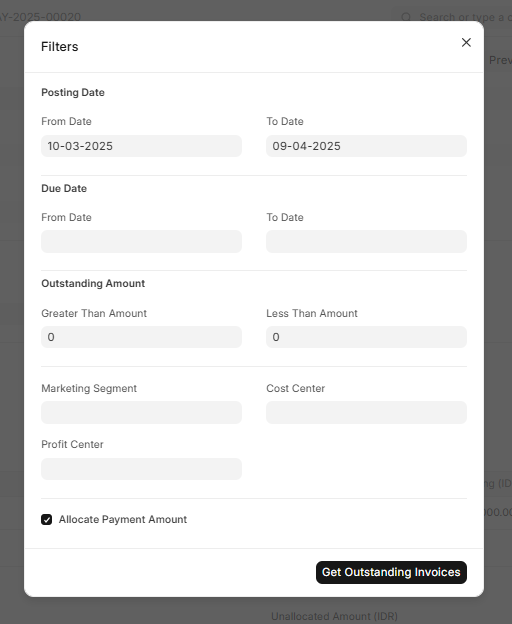
- Fetching Outstanding Invoices
- Use the Get Outstanding Invoices button to auto-fetch linked Sales Invoices.
- Allows allocating one payment against multiple invoices.
- Enter the Paid Amount, select relevant invoices, and adjust allocations in the Allocated field if needed.
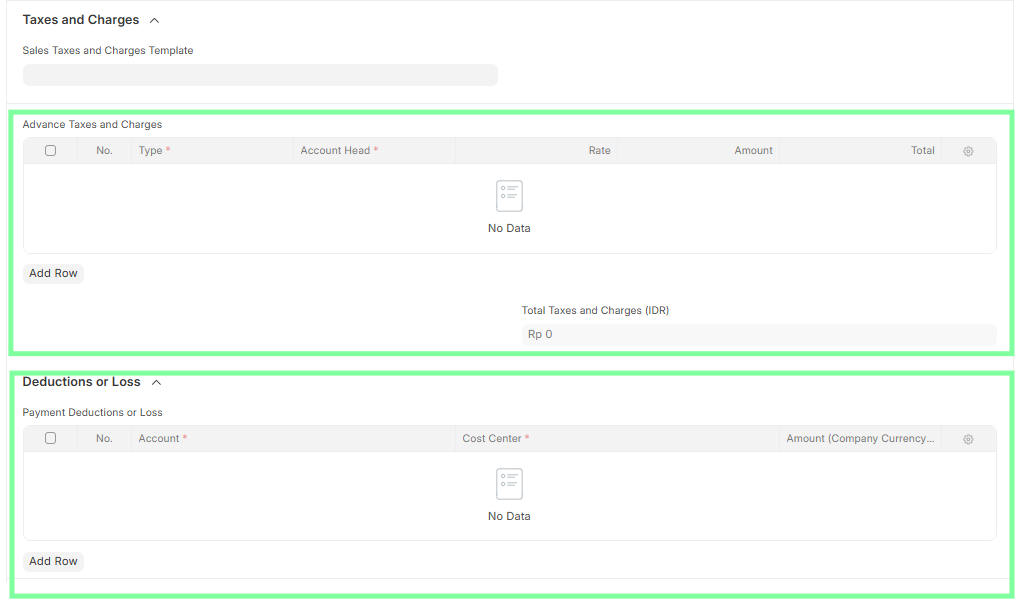
- Add any additional details such as applicable Taxes or Deductions if required.
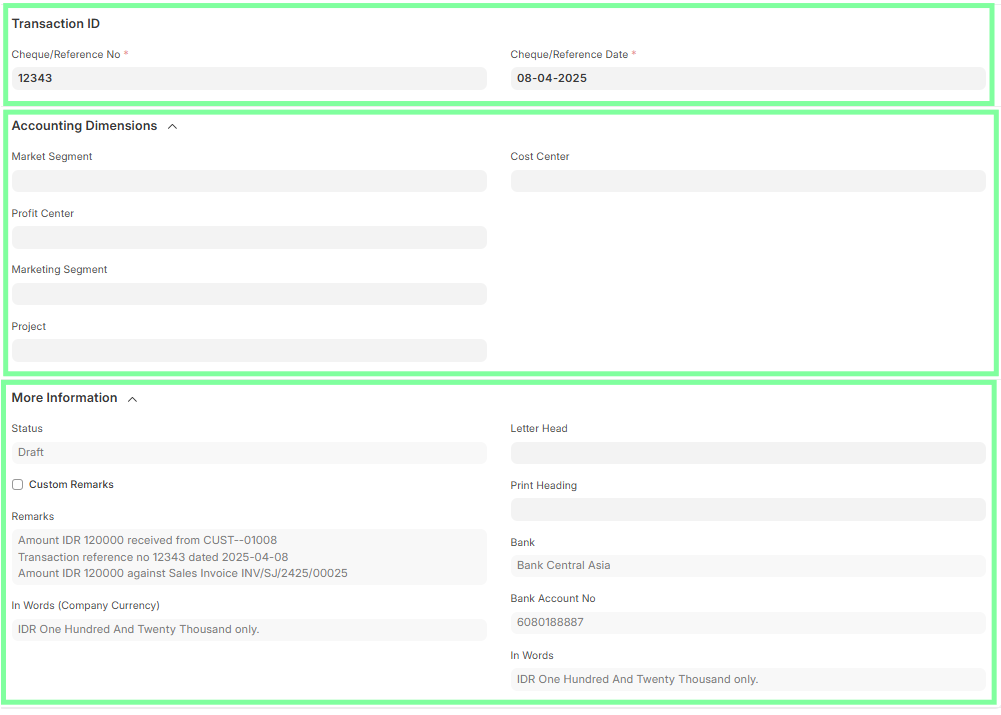
Transaction ID details are mandatory, including:
- Cheque/Reference No
- Cheque/Reference Date
In the More Information section:
- Verify Status, Letter Head, Print Heading
- Update Custom Remarks if necessary
Ensure all fields are accurate and complete.
Save and Submit the Bank Entry to generate the corresponding journal entry reflecting the bank receipt.