FI- Sales Invoice Submission Test
Executed by
Accounts Executive - Receivable Finance Manager
Processes triggered from
- Student Admission - New Student Admission "(Variant)", Existing Student "(Variant)"
- Student Transfer
- Other Sales
- Stundent Refund - Credit Note
- Asset Managment - Selling an Asset
Navigation
Navigation 1 : Home > Accounting Module > Select Sales Invoice > Click on New Sales Invoice
Navigation 2 : Home > Go to Selling Module > Go to Sales Invoice
Steps
- Open the Sales Invoice.
- Select the invoice in Draft status.
- Verify the invoice based on its Invoice Type.
i) Registration Invoice
Header Section
- Invoice Type: Registration Invoice
- Customer Details (Customer, Student Name, Guardian Name)
- Academic Year
- Class
- Invoice Date and Posting Time
- Payment Due Date
- Profit Center and Cost Center

Line Item Section
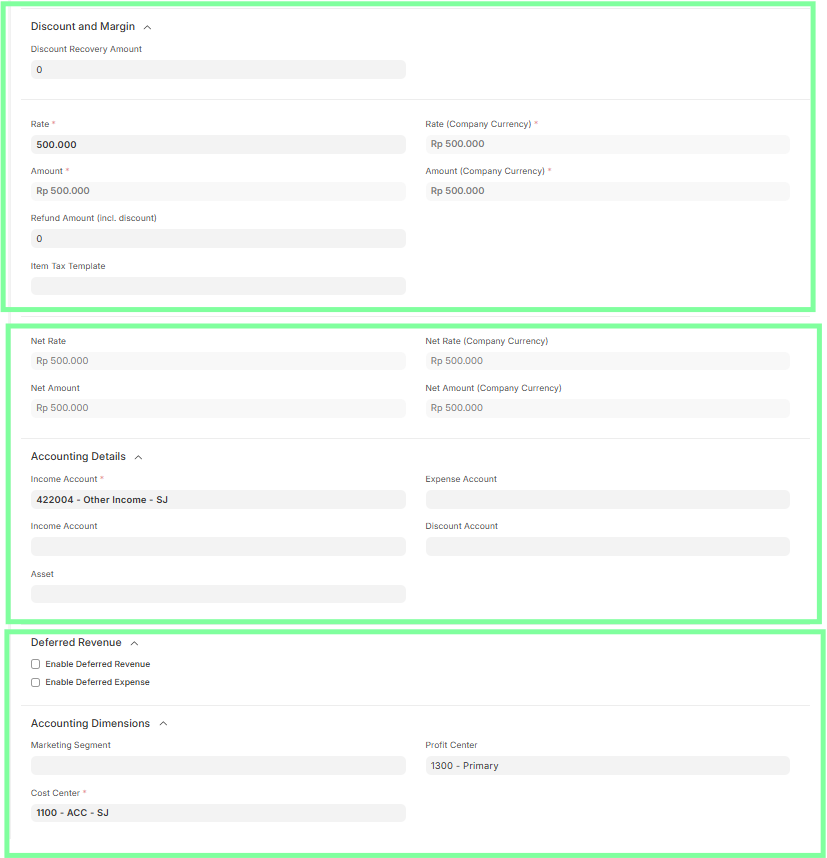
- Check that the item is correct (e.g., Registration Fee)
- Verify Quantity and Discount % / Discount Amount, if applicable
- Ensure correct Income Account, Expense Account, and Discount Account
- Deferred Revenue should be disabled
- Ensure Profit Center and Cost Center fields are filled (Mandatory under Accounting Dimensions)


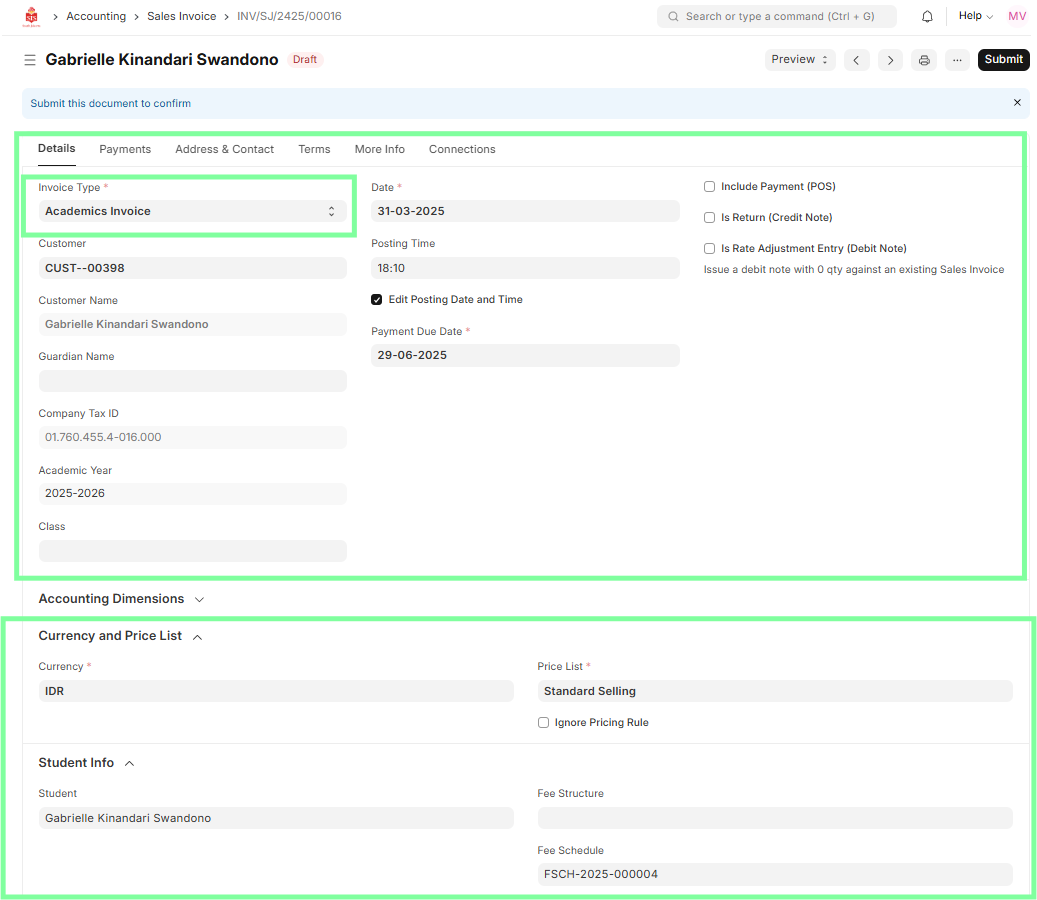
ii) Academic Invoice
Header Section
- Invoice Type: Academic Invoice
- Customer Details (Customer, Student Name, Guardian Name)
- Academic Year
- Class
- Invoice Date and Posting Time
- Payment Due Date
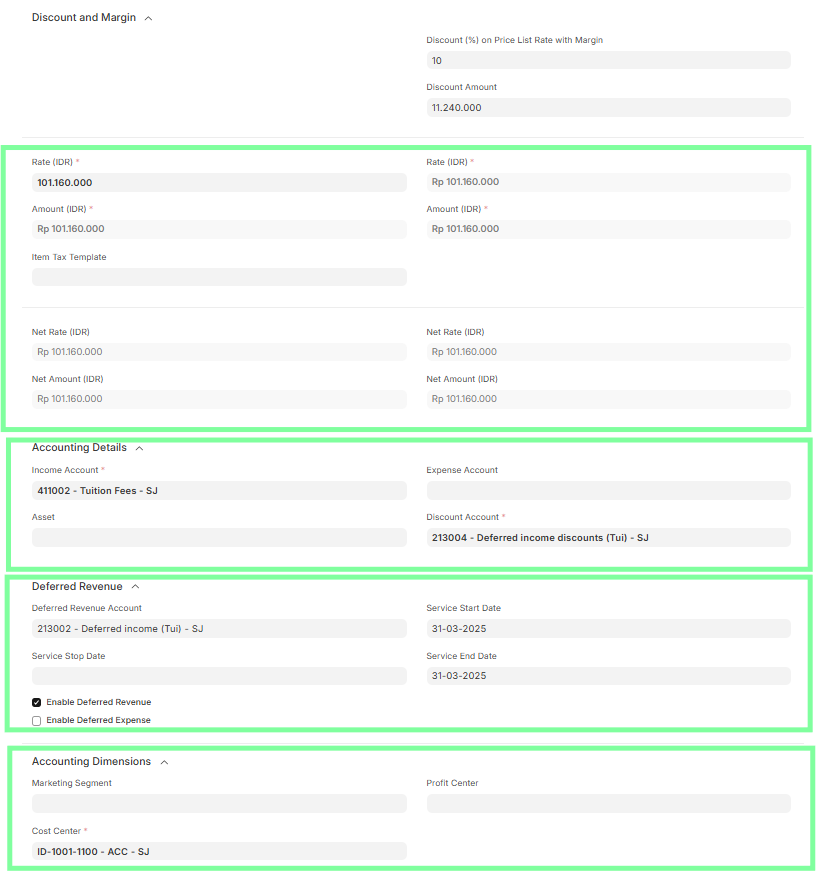
Line Item Section
- Check that the academic item is selected correctly
- Verify Quantity and Discount % / Discount Amount, if applicable
- Ensure correct Income Account, Expense Account, and Discount Account are mapped
- Deferred Revenue should be enabled & Enter Service Start Date and Service End Date
- Profit Center and Cost Center are mandatory

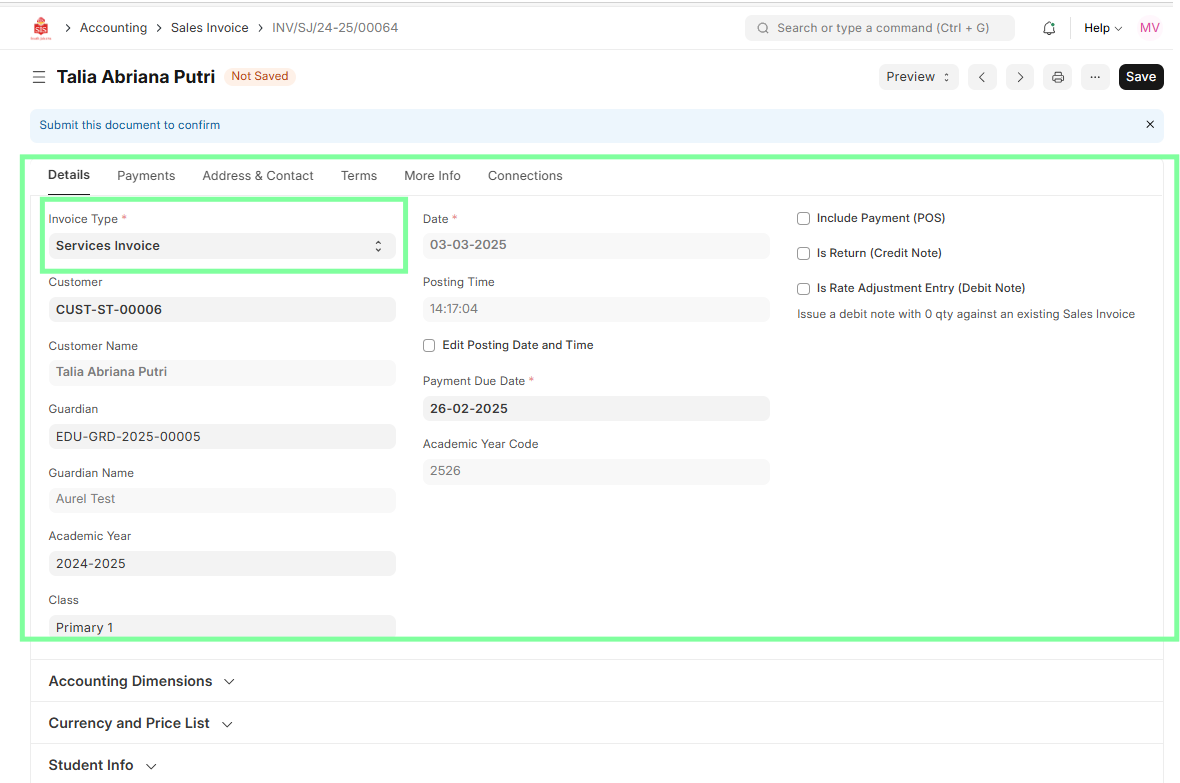
iii) Service Invoice
Header Section
- Invoice Type: Service Invoice
- Customer Details
- Academic Year (if applicable)
- Class (if applicable)
- Invoice Date and Posting Time
- Payment Due Date
Line Item Section
- Check that the service item is correct
- Validate any Discount % / Amount, if applicable
- Ensure correct Income Account, Expense Account, and Discount Account are mapped
- Deferred Revenue should be enabled (only if applicable to the scenario)
- Enter Service Start Date and Service End Date if Deferred is active
- Profit Center and Cost Center are mandatory

iv) Credit Note
Steps to Create a Credit Note:
- In the Sales Invoice, select the invoice for which a credit note needs to be created.
- Click on the Create button. A new Sales Invoice form will open with existing data.
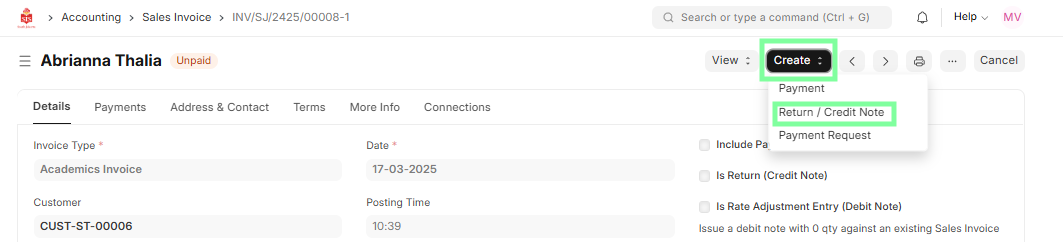
Credit Note Processing:
- In Header Data: Verify the student details and make sure Is Return (Credit Note) is ticked.
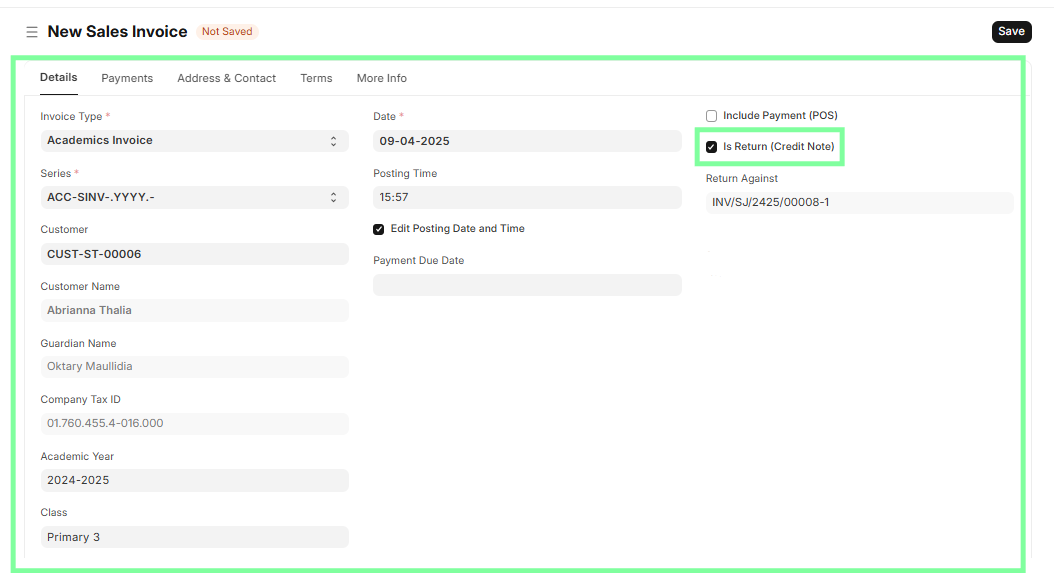
- In Line Item Data:
- Delete the Development Fee line.

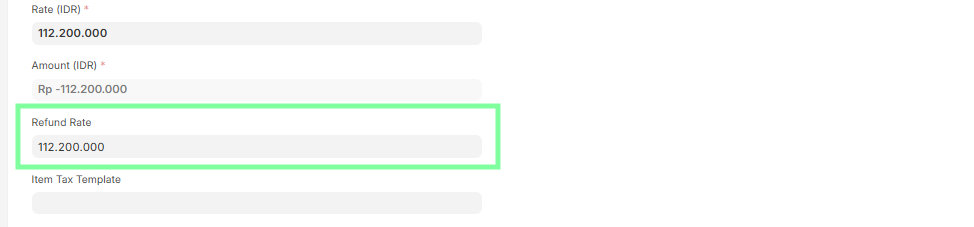
- Update the Refund Rate using the formula:
Unit Price - Revenue consumed amount = Refund Rate
Save the credit note to let the system calculate the net refund amount, considering any discount provided.
- The discount category & percentage will be fetched from the original Sales Invoice.
Note: Refund amount will not be calculated unless the Credit Note is saved and status is 'Draft'.
- The discount category & percentage will be fetched from the original Sales Invoice.
After saving:
- Ensure 'Enable Deferred Revenue' & 'Enable Deferred Expense' are unchecked.

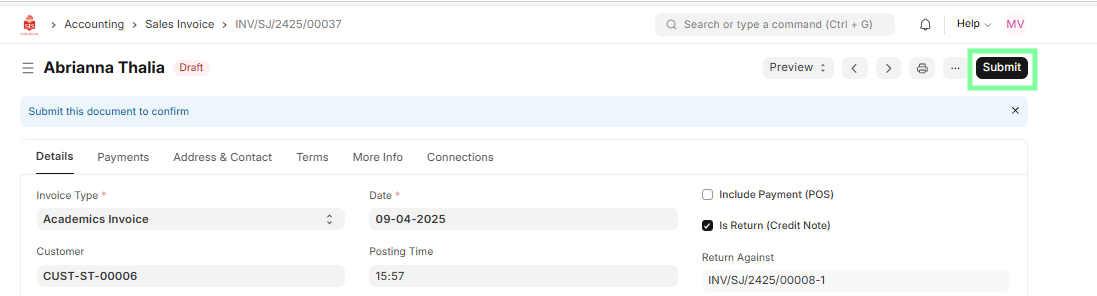
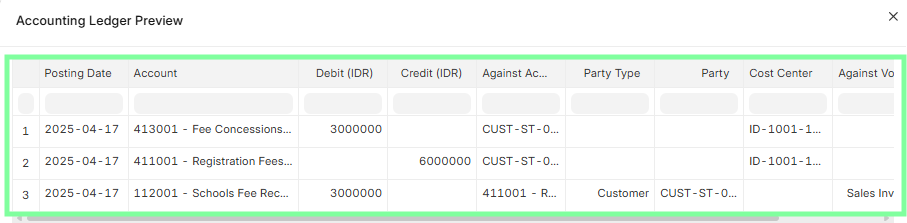
Preview the Accounting Ledger.
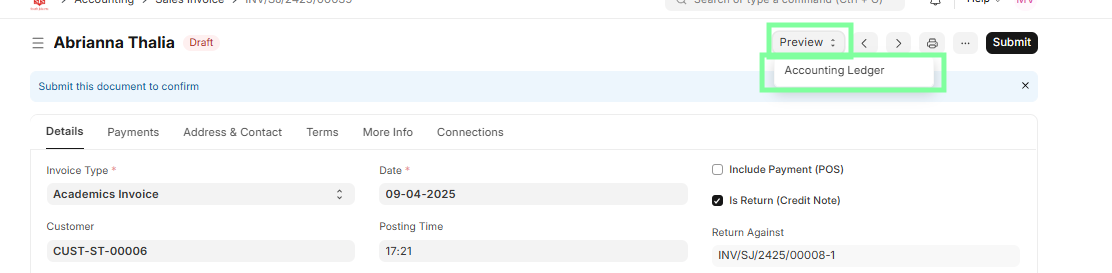
Submit the Credit Note.
Post-Submission:
- A new entry will be created in the Sales Invoice with the status: "Return".
- The original invoice's status will be updated to: "Credit Note Issued".
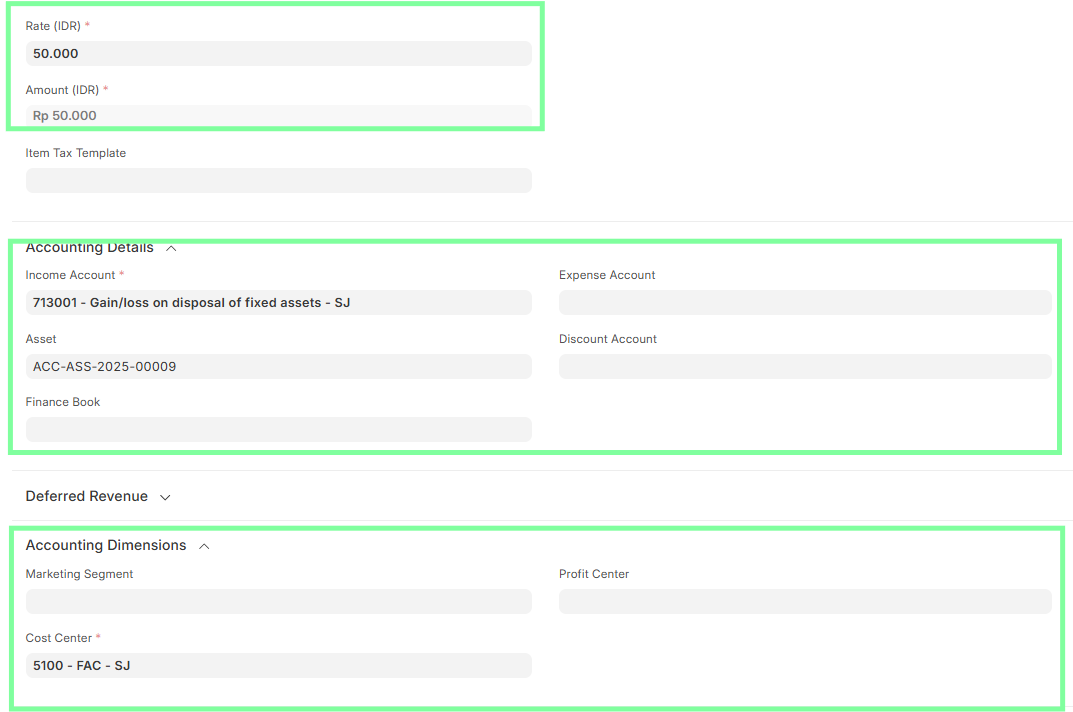
v) Selling an Asset
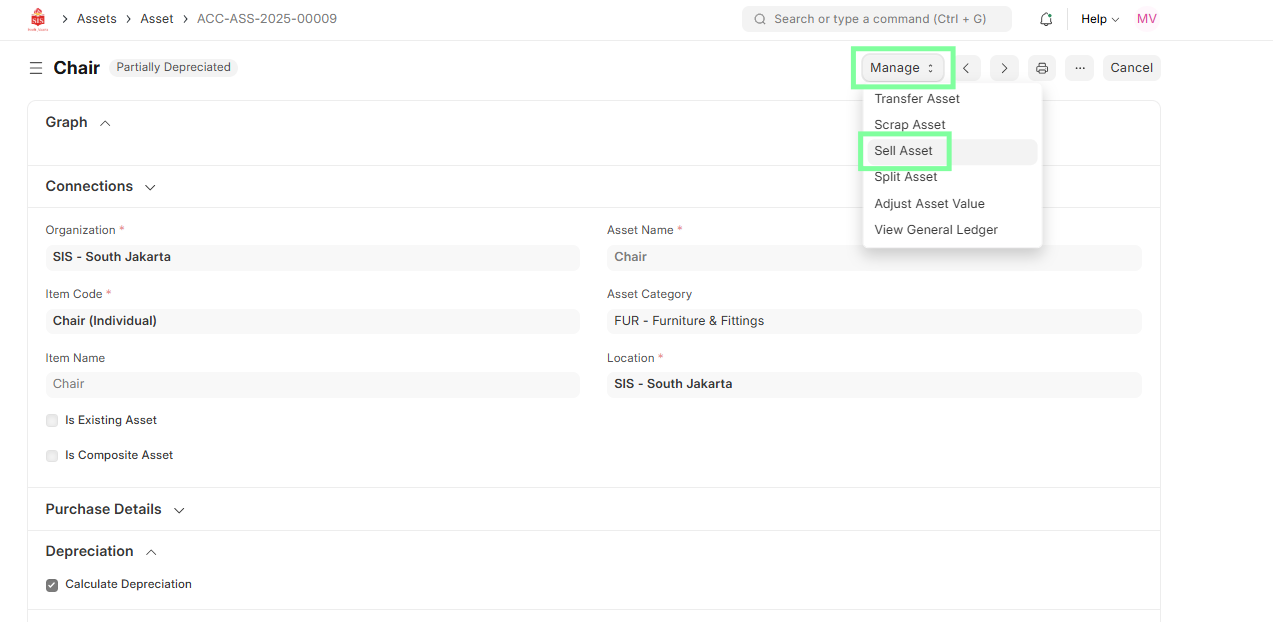
Steps to Generate Sales Invoice from Asset:
- Navigate to the Asset Module.
- Open the asset record that needs to be sold.
- Click on the “Sell Asset” button located in the top-right of the asset document.
- This will automatically generate a new Sales Invoice with pre-filled asset details.
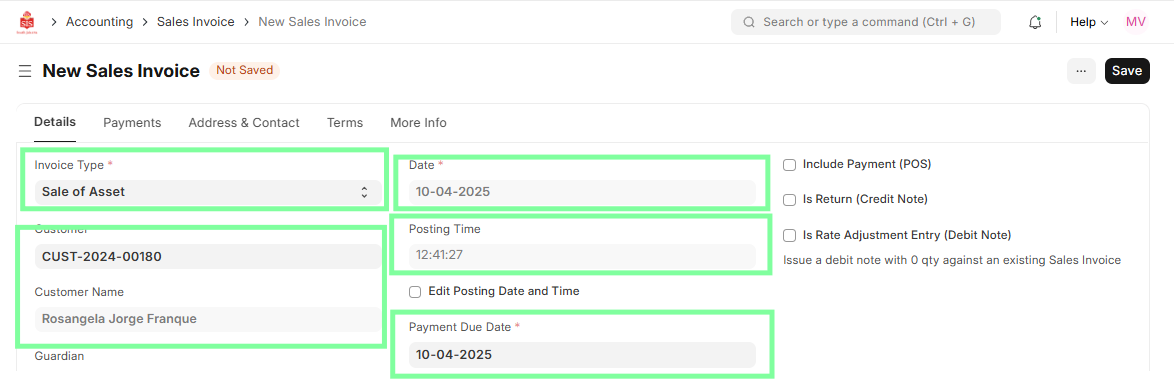
Header Section
- Invoice Type: Sale of Asset
- Customer Details (Customer Name and Contact Information)
- Asset Name and Asset ID (automatically pulled from Asset record)
- Invoice Date, Posting Time, and Payment Due Date
Line Item Section
- Asset Item appears as the line item
- Verify the Item Code, Asset Name, and Description

- Validate Selling Price / Amount
- Check Income Account also ensure Expense Account and Cost Center are mapped
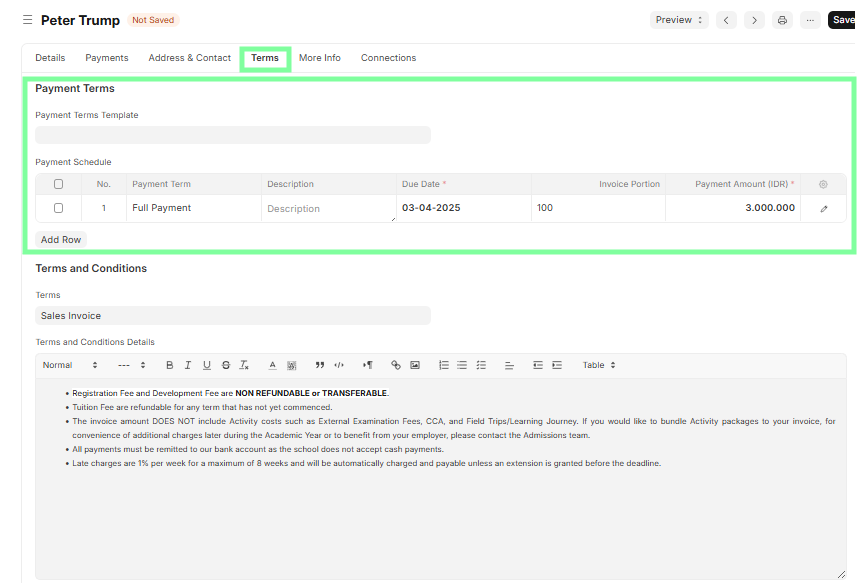
- Confirm Payment Terms are correctly set based on the agreement or fee structure.
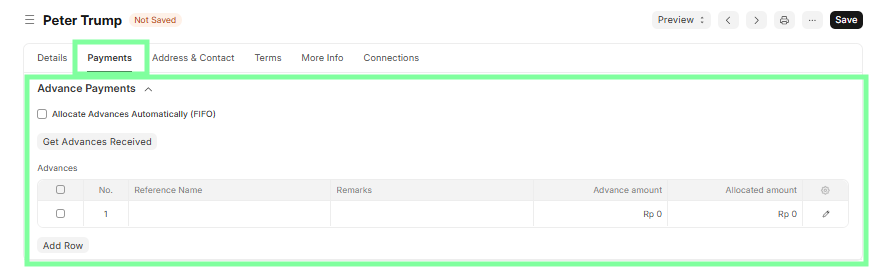
- Match the invoice against any advance/deposit received, if applicable (especially for admission deposits or prepayments).
10

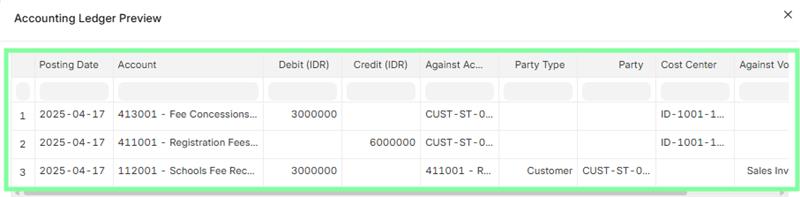
- Conduct a Final Review of the invoice and Preview the Accounting Ledger to ensure proper account mappings and totals.
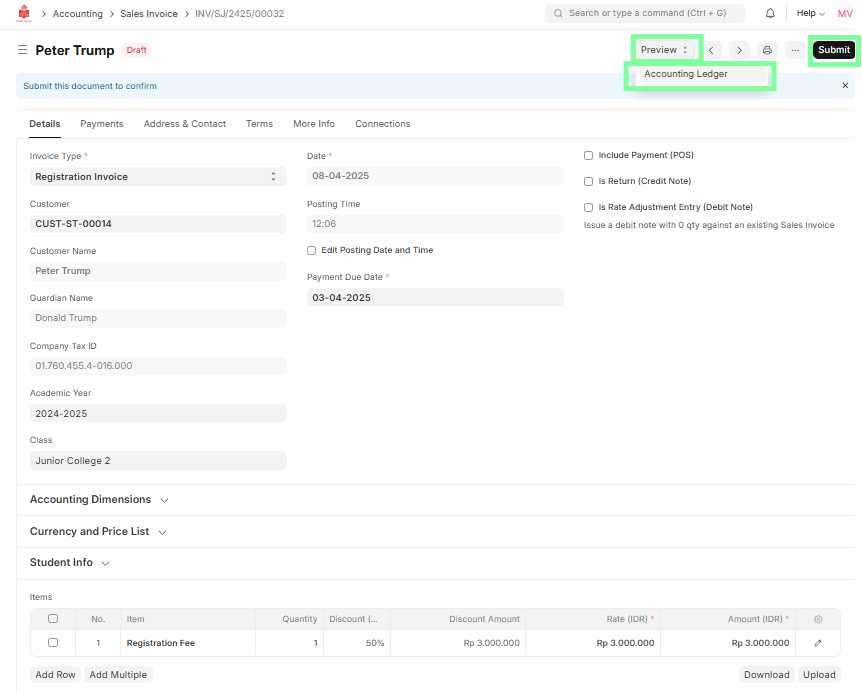
- Submit the Sales Invoice and automatically generate the corresponding journal entry.
13