FI- Outgoing Bank Entry Creation
Executed by
Accounts Executive - Payable
Processes triggered from
- Campaign Management
- PO-based Procurement
- Service/Contract based Procurement
- Non Po based Procurement
- Reimbursement & Claims - Expense Claim "(Varaint)", Employee Advance "(Varaint)"
- Student Refund
Navigation
Navigation 1 : Home > Go to Accounting Module > Go to Payables > Go to Payment Request > Create Bank Entry
Navigation 2 For Expense Payout : Home > HR Module > Expense Claim > Create Payment
Navigation 3 For Advance Payout : Home > HR Module > Employee Advance > Create Payment
Steps
Navigate to the Payment Request or Bank Entry section.
Create a new Bank Entry.
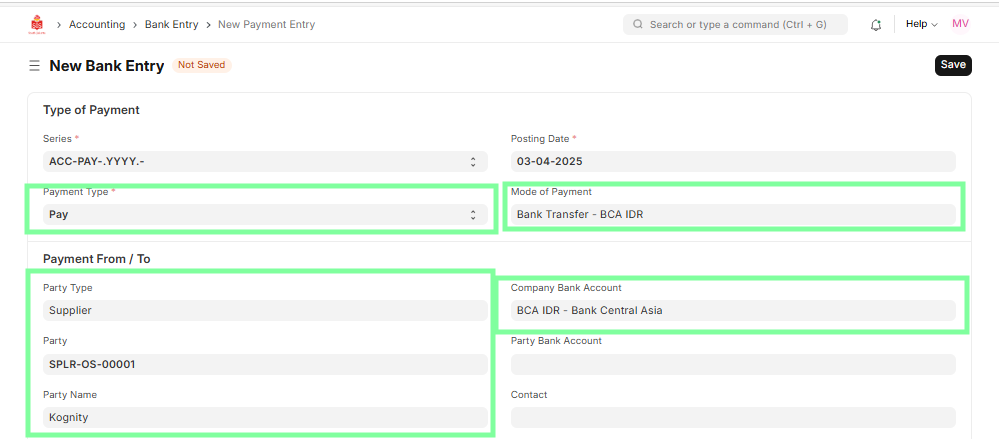
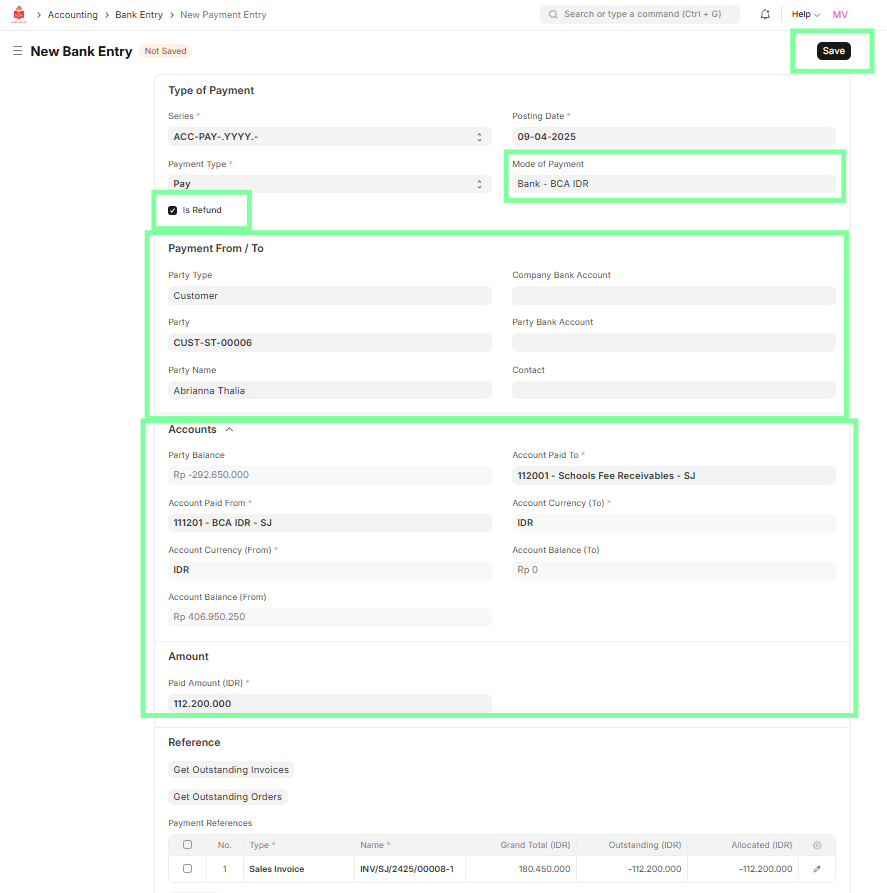
Select the Payment Type as Pay, and verify and enter payment details, including Mode of Payment, Party Type (Supplier/Employee), Party Name, Company Bank Account (mandatory),and Reference Details such as Purchase Invoice, Bank Account, Amount, and Date.
 4. Verify the Account tab details, including Account Paid From, Account Paid To, and other relevant fields.
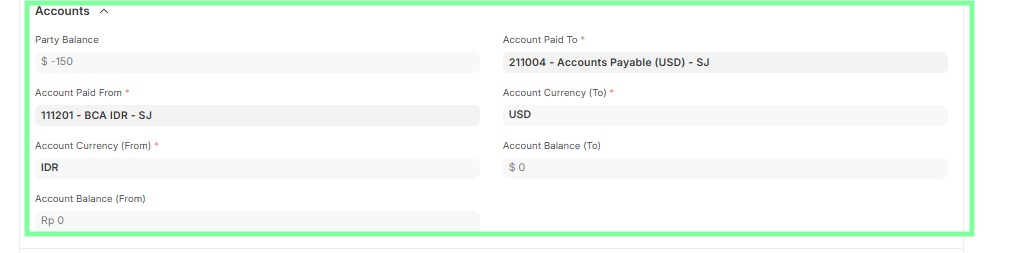 5. Verify that the Paid Amount field is mandatory and accurately reflects the actual amount paid.

Fetching Outstanding Invoices -
- Allows making payments to multiple Purchase Invoices using a single Payment Entry.
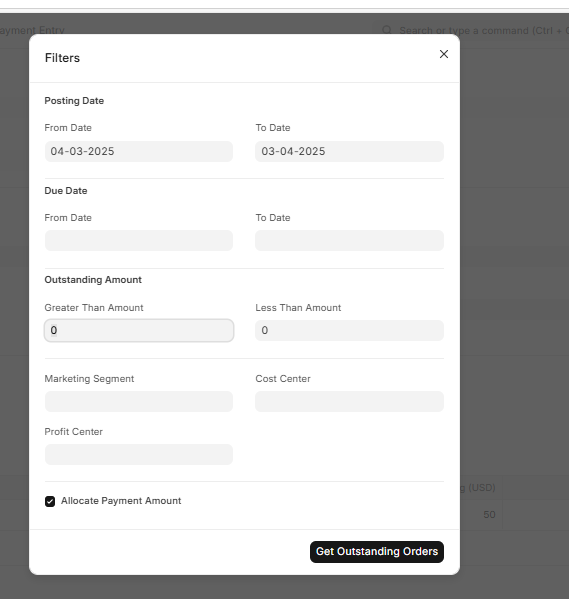
- In the Payment Entry screen, click the Get Outstanding Invoices or Get Outstanding Orders button to fetch all outstanding orders for the selected Party.
- The Paid Amount must be entered for these buttons to become visible.
- Users can select a date range and specify which invoices to fetch.
- If the Party has not made full payment, enter the amount paid in the Allocated field.
- For Suppliers, the Payment Amount is allocated against Purchase Invoices.
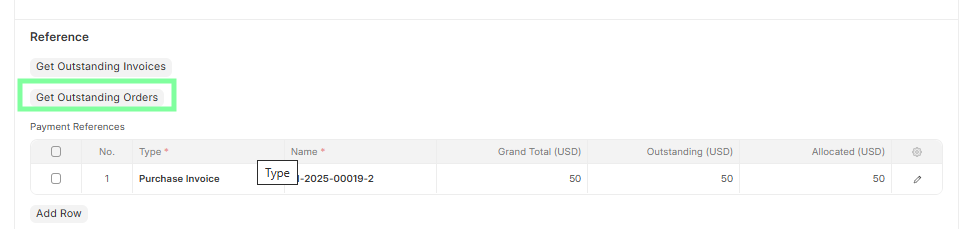
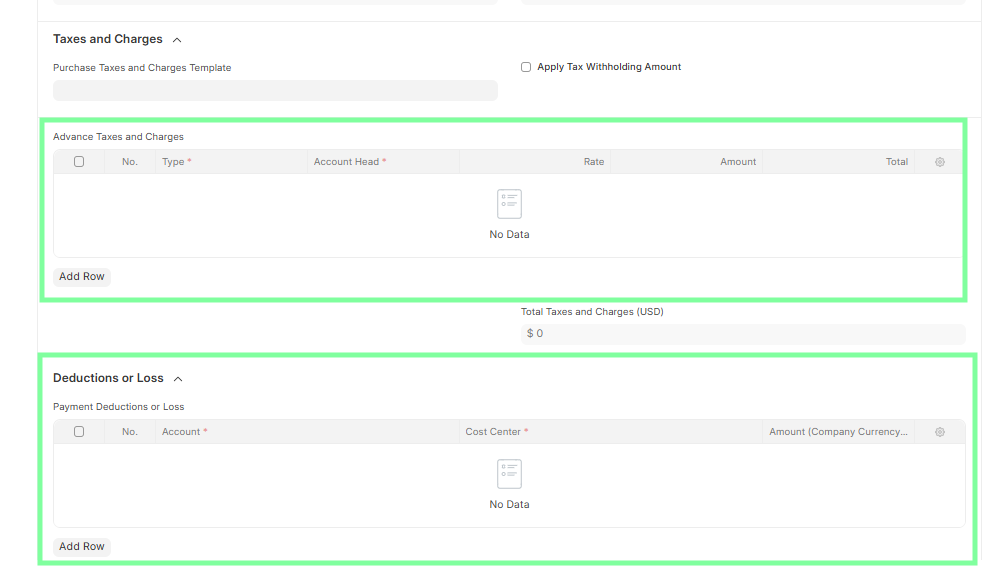
- Add any additional details such as applicable Taxes or Deductions if required.
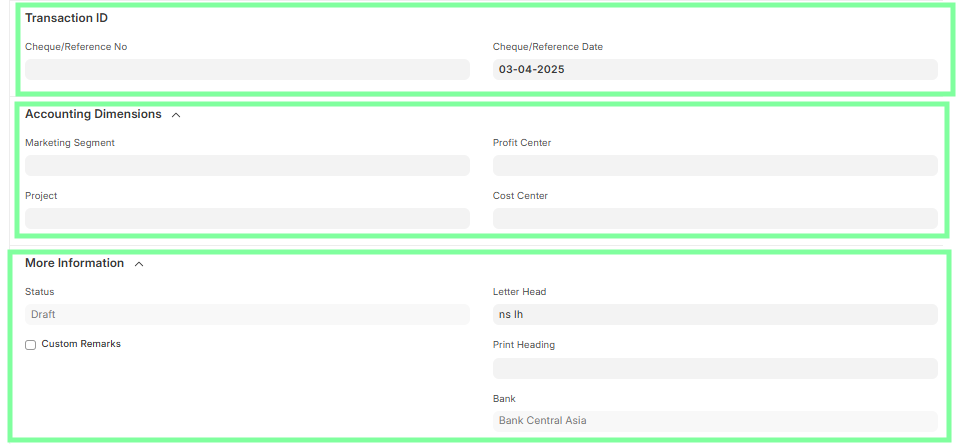
 8. The Transaction ID field is mandatory, including Cheque/Reference No and Cheque/Reference Date, whereas the Accounting Dimension is not required since both accounts are Balance Sheet accounts. In the More Information section, verify the Status, Letter Head, and Print Heading fields and update Custom Remarks if necessary.
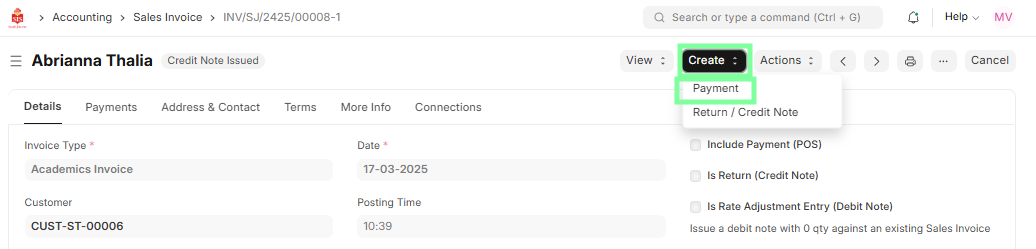
Special Case: Student Refund via Credit Note
- Select the Sales Invoice with the status Credit Note Issued
- Click on the Create button and select Payment; this will open the Bank Entry form
- In the Bank Entry form, follow the same steps as above
- Ensure the "Is Refund" checkbox is enabled
Ensure all fields are correct and complete.
Save the Bank Entry and Submit the Bank Entry to generate the corresponding journal entry.